> For the complete documentation index, see [llms.txt](https://docs.meeco.me/llms.txt). Markdown versions of documentation pages are available by appending `.md` to page URLs; this page is available as [Markdown](https://docs.meeco.me/guides/portal-tutorials/organisation-administrators/applications.md).
# Applications
### Introduction
Applications leverage [OAuth2's client credentials grant](https://oauth.net/2/grant-types/client-credentials/), a protocol designed for machine-to-machine (M2M) authentication. In this setup, a client ID and client secret are used to authenticate and obtain an access token. This token, representing the specific application rather than a user, is then used to authorise the application to perform specific operations such as credential issuance, revocation and verification, and managing Organisation Administrators within the context of a particular Organisation. This approach enables secure and controlled access for services.
### Create an application
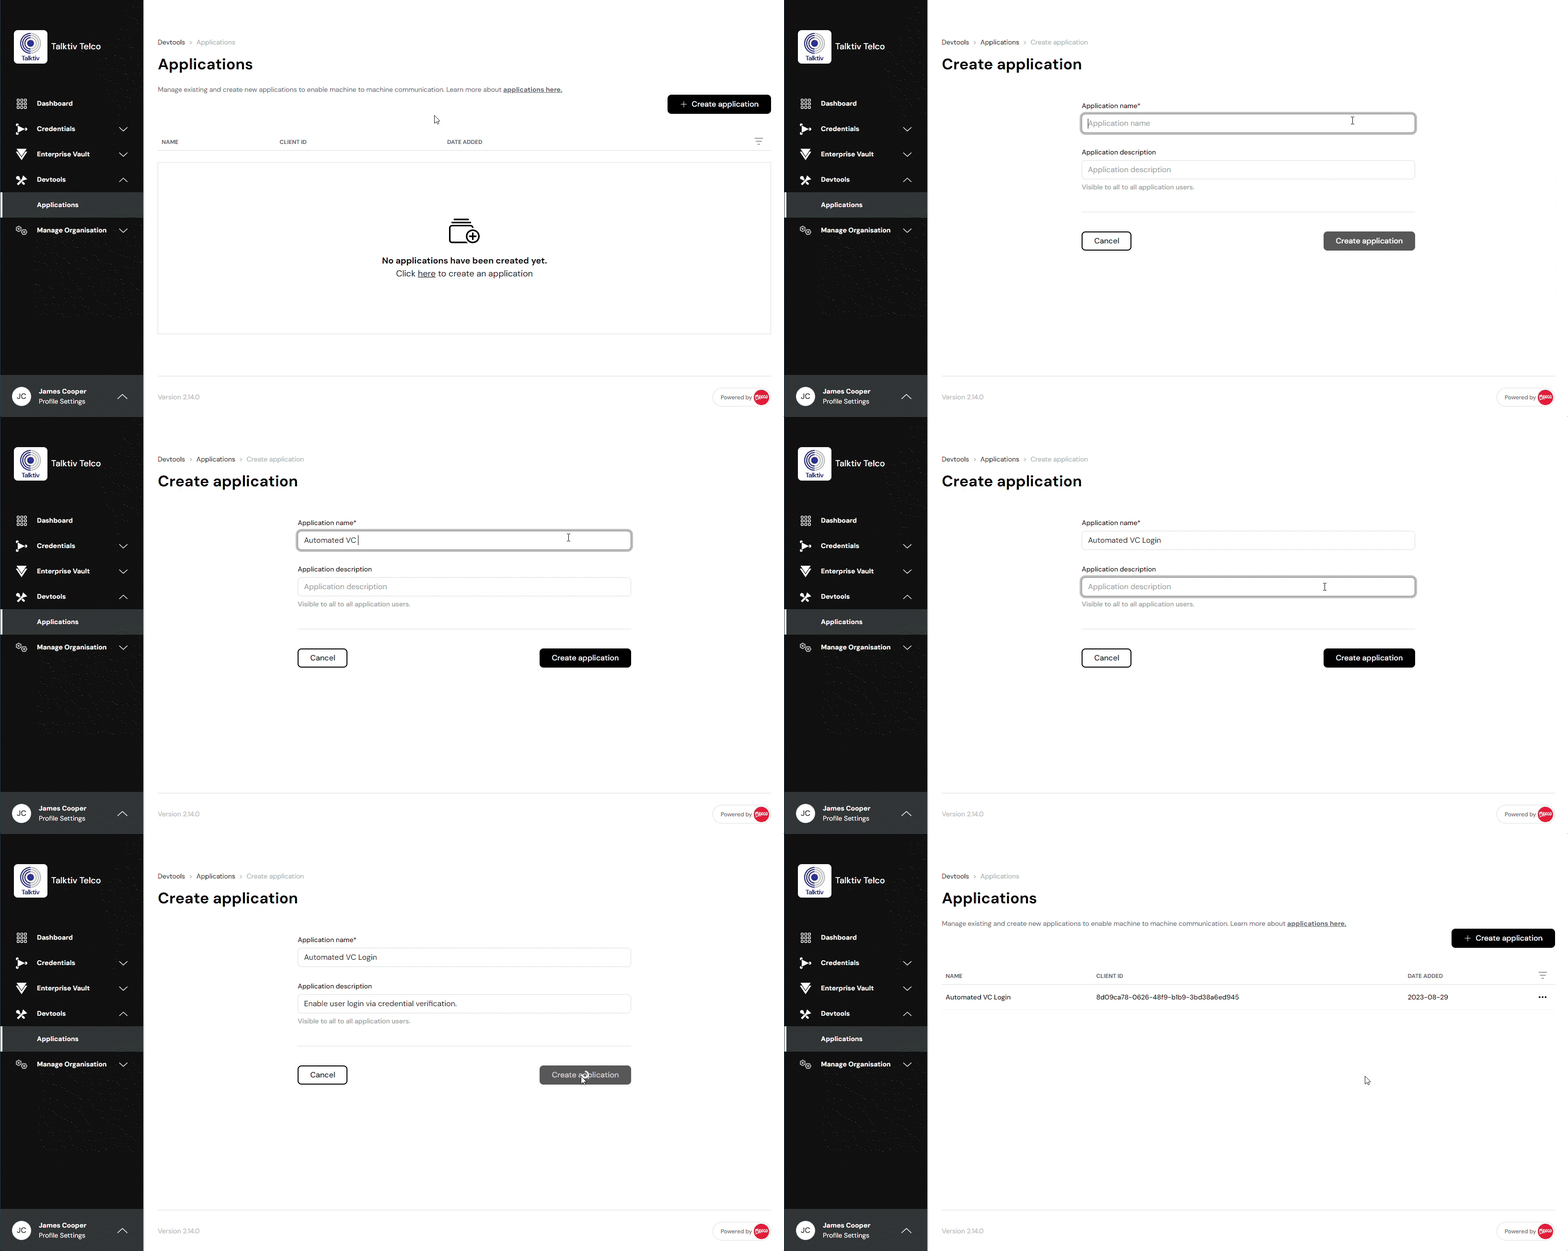
Organisation Administrators can create a new application by navigating to *Devtools* on the left-side menu of the SVX Portal, and selecting *Applications*. After selecting the *Create application* button, you will be presented with a form. The form consists of the following fields:
* Application name
* Application description
> **Note** *Application description:* Enter a description so that users know what the application is and / or is used for.
Once all required fields are complete select the *Create application* button and the application will appear in a list with a designated Client ID.
### View and edit an application
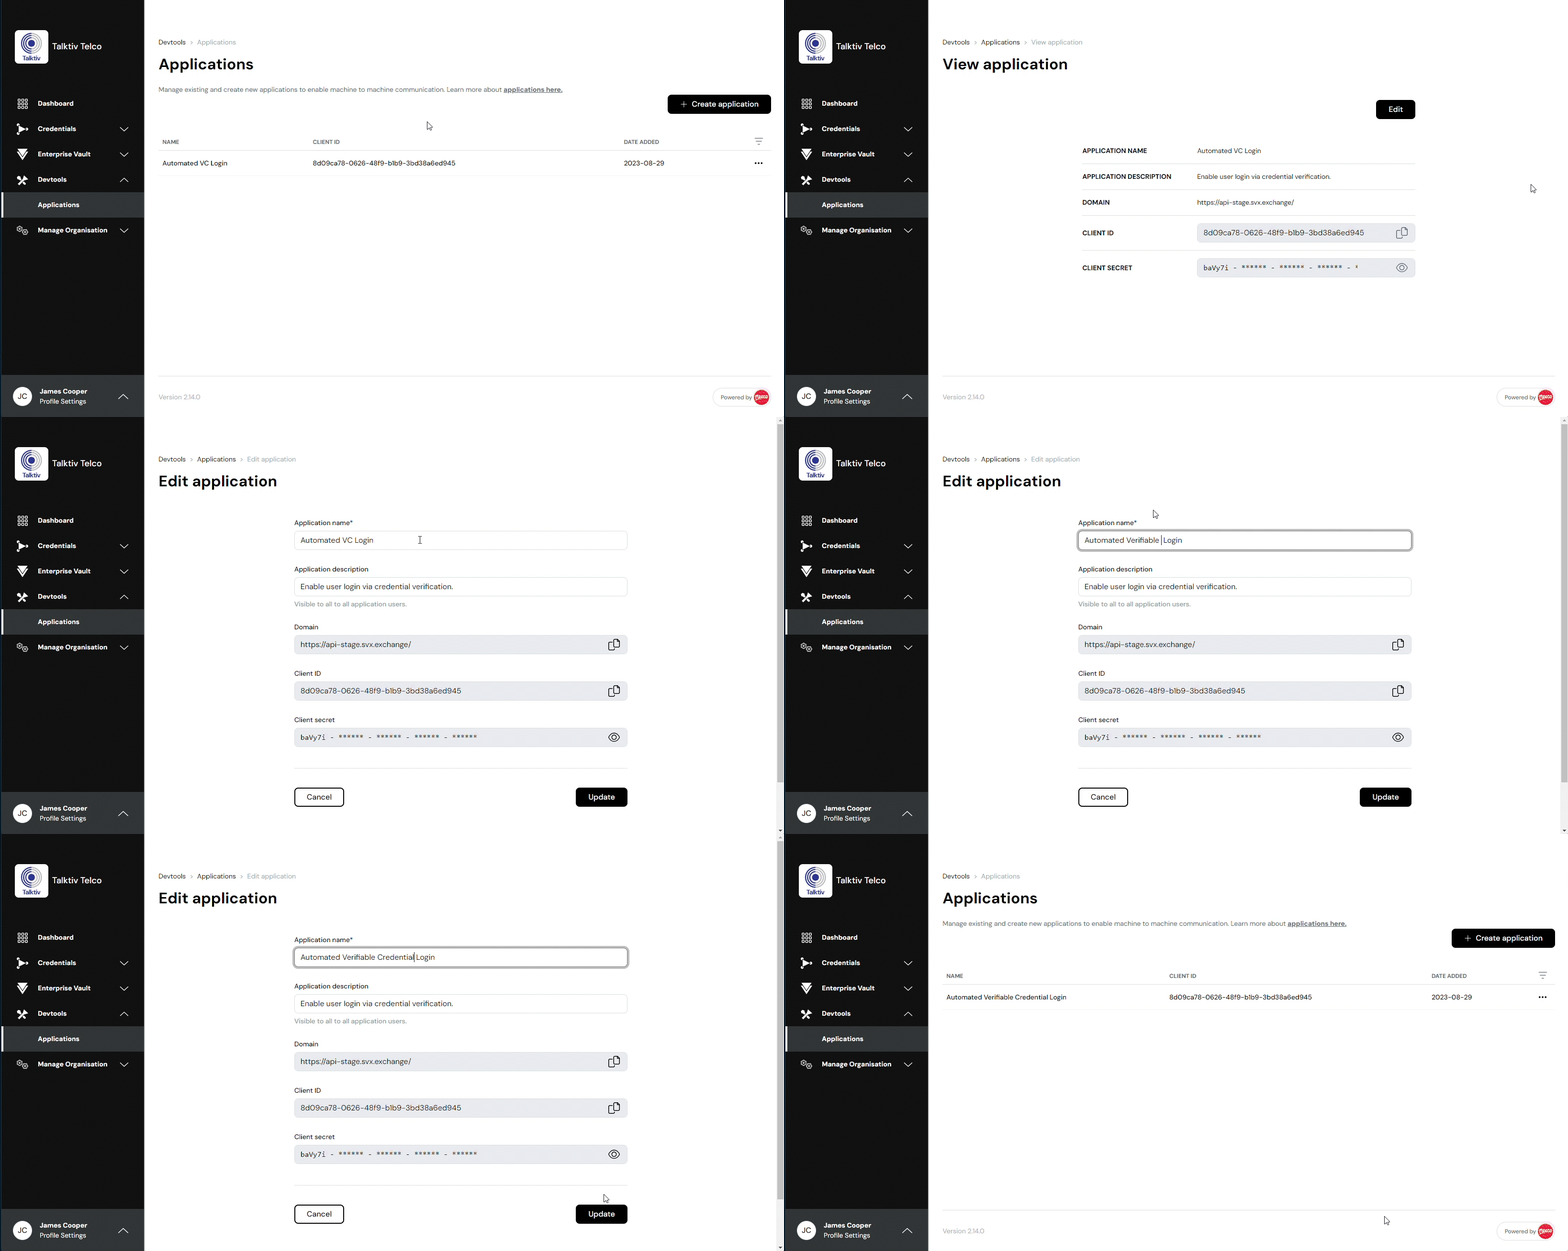
Organisation Administrators can view applications by navigating to *Devtools* on the left-side menu of the SVX Portal, and selecting *Applications*.
Locate the application in the list and select the horizontal ellipsis icon ⋯ alongside the application’s name to reveal menu options. Select *View*. You will be presented with the following information:
* Application name
* Application description
* Domain
* Client ID
* Client secret
> **Note** *Client ID:* You can copy this information to your clipboard.
> **Note** *Client secret:* This field is hidden for security and privacy reasons. Click on the eye 👁 icon to reveal the entire secret.
To edit the application’s details, select the *Edit* button from the *View application* page or select *Edit* from the horizontal ellipsis icon ⋯ alongside the application’s name. The information will be presented as an editable form where you can update / change the following fields:
* Application name
* Application description
When complete, select *Save* to save changes, or *Cancel* to discard changes.
### Enable machine-2-machine authentication
An Organisation Administrator can provide an application with authenticated access to SVX functionality. This allows the application to perform the following actions:
* Create and archive credential templates
* Issue and revoke credentials
* Create and archive verification templates
* Create verification requests and view verification responses
* Create and cancel connections with end-users
Once an application has been created, the Organisation Administrator can navigate to *Devtools* on the left-side menu of the SVX Portal, select *Applications*, locate the application in the list and select the horizontal ellipsis icon ⋯ alongside the application’s name to reveal menu options. After selecting *View* you will be able to copy the Client ID and Client Secret which you can use to provide your application authenticated access to the SVX Platform.
### Delete an application
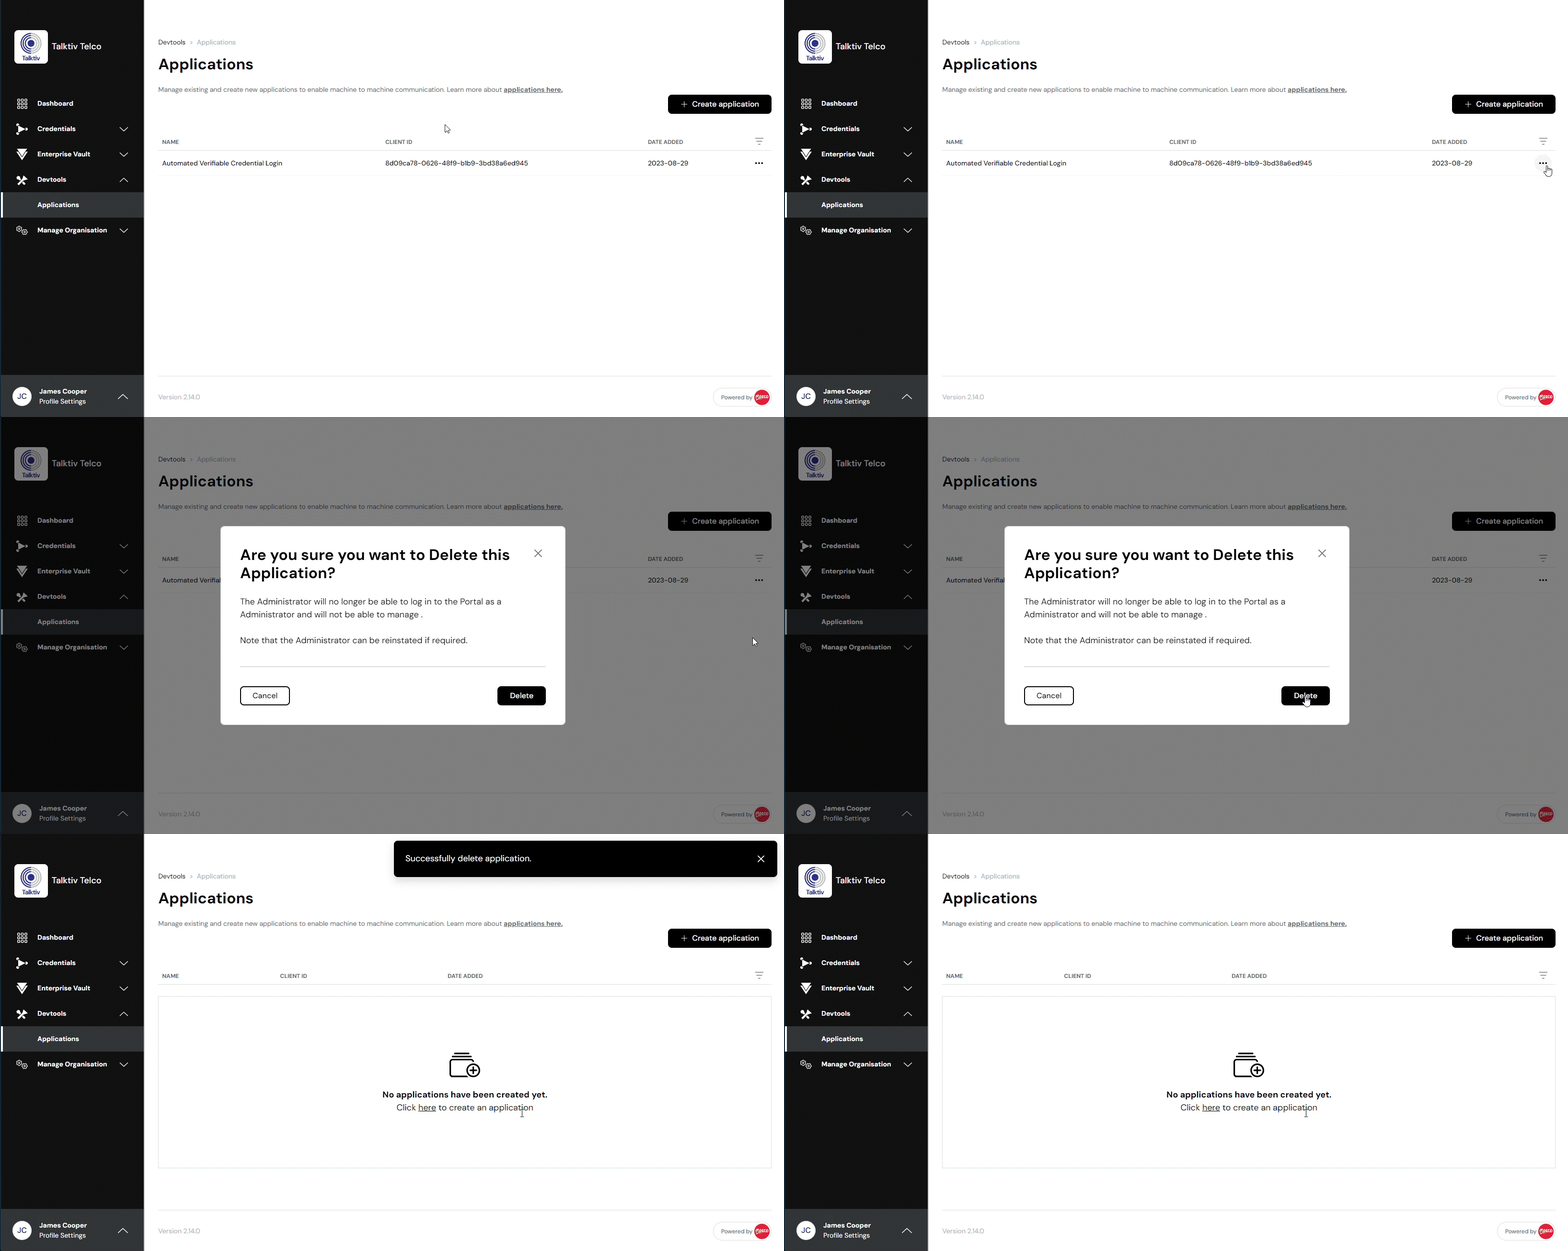
To remove an application from your Organisation navigate to *Devtools* on the left-side menu of the SVX Portal, and select *Applications*. Locate the application in the list and select the horizontal ellipsis icon ⋯ alongside the application’s name to reveal menu options. Select *Delete* and confirm the deletion of the application via the modal window. The application will be permanently deleted from the Tenant, and will no longer appear in the list.